|
www.tlab.it
Prepare a Corpus (Corpus
Builder)
 N.B.: The pictures shown in this section have been obtained by
using a previous version of T-LAB. In T-LAB
10 this tool includes two additional buttons: a) one,
named Text Screening, which becomes
enabled when the corpus size is up to 20 MB; b) the other which
allows the user to immediately proceed with the import of selected
textual materials (see the below picture).

This software tool is intended to simplify and speed up
any transformation of documents and textual materials into a corpus
file ready to be processed by T-LAB.
More specifically, such a tool allows the following
operations:
1. Automatically import
various types of files;
2. Edit and tag them by using categorical variables;
3. Save the result as a corpus file
ready to be imported by T-LAB;
4. Check and modify any corpus file which corresponds to the
T-LAB
format.
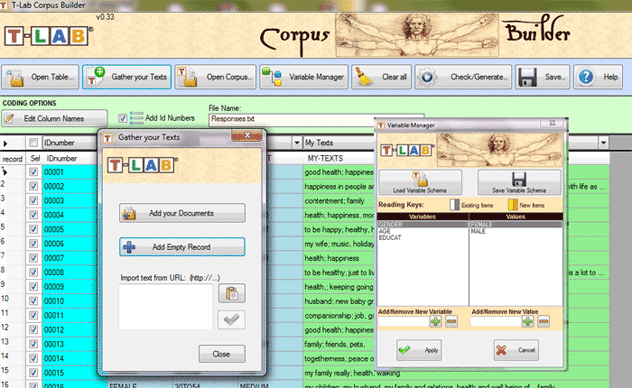
While the way that files are imported (see '1' above)
varies according to their format, all the other operations follow
the same logic.
Below is a short description of how to import the various
files.
A - Importing files in tabular
or spreadsheet format (CSV, .SAV, .JSON, .XML, .XLS,
XLSX, .MDB, .ACCDB).
A single file which includes
up to 30,000 records can be imported by the 'Open Table' option or
by a simple drag and drop method (N.B.: When text for each line
doesn't exceed 2.000 characters, up to 99.999 records can be
imported).
The fields/columns of such a file can contain the
following data:
- Categorical Variables (one for each
column, up to a 50 columns);
- Texts to be analysed (only one
column);;
- IDnumbers, i.e. identifiers of
subjects (e.g. in the case of answers to open-ended questions) or
of context units in which the corpus to be imported is
subdivided.
N.B.: While the presence of Categorical Variables and IDnumbers is
optional, the presence of at least one column containing the texts
to be analysed is mandatory.
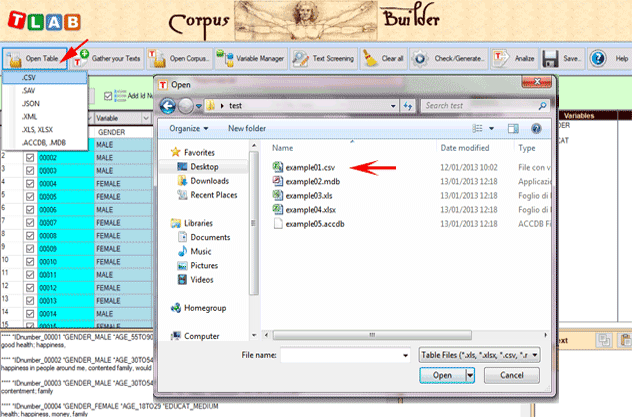
When importing a .CSV file, the corresponding delimiter
must be selected (see below).

When importing Excel or Access files, only one table can
be selected (see below).

B - Importing document files of
various formats
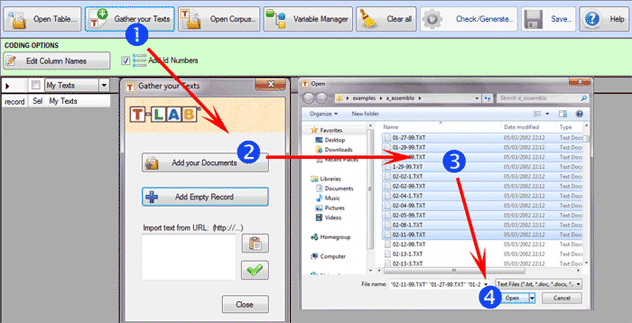
Up to 30,000
documents can be imported, either one by one or by multiple
selection, through the 'Gather your Texts' option (see below).
Three methods are
available:.
The first method ('Add your
Documents') allows the automatic importation of .TXT, .DOC, .DOCX,
.PDF and .RTF files.
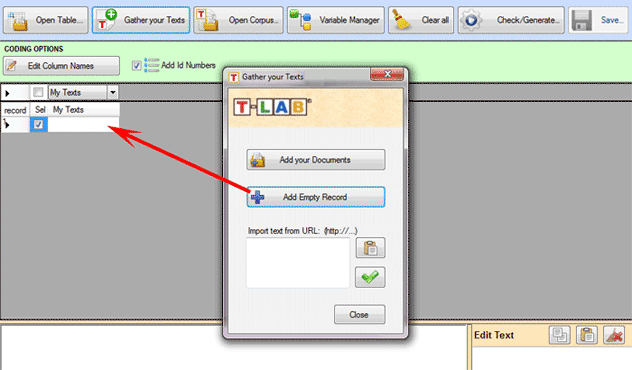
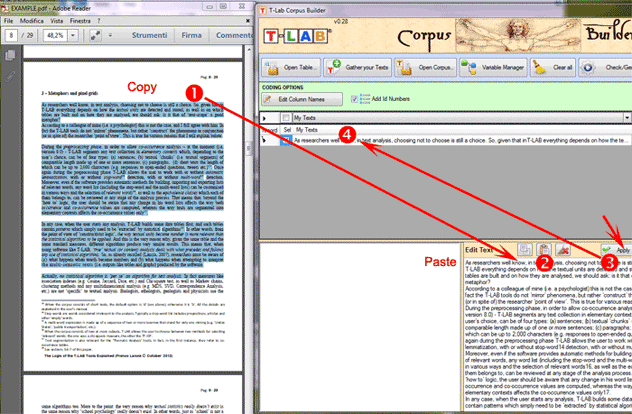
The second method ('Add
EmptyRecord') allows the user to copy/paste any type of text (see
below).
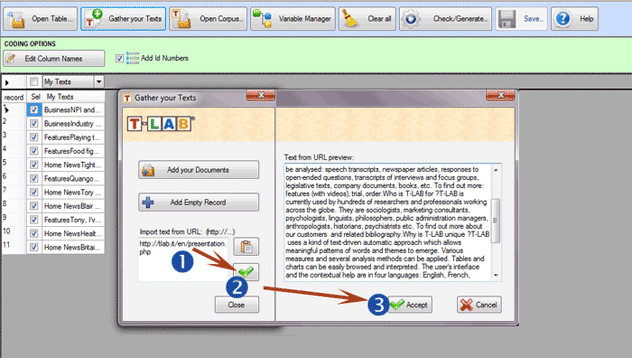
The third method ('Import
Text from URL') allows downloading HTML files from Internet, as
well as editing their content before the importation (see below).
.
C - Importing a
corpus file already encoded according to the
T-LAB
specifications.
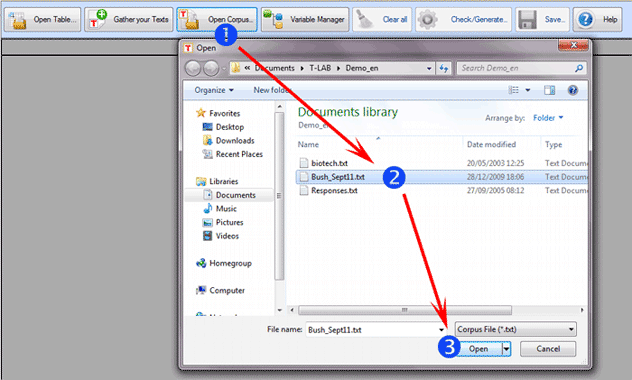
The use of the 'Open Corpus' option is advisable in the
following three cases:
1 - the user intends to modify the structure of a corpus
already encoded (e.g. add further texts by means of methods
explained in the previous 'B' section, modify the labels of
variables and values, etc.);
2 - the user intends to check/fix errors of his manual coding that
had been possibly done without the aid of the Corpus Builder
module;
3 - the user intends to import a corpus file with a 'raw' coding,
that is a corpus the sections of which (i.e. documents or records)
are preceded by a coding line with four asterisks ('**** ')., just
followed by a blank space and a return key (see below).
.

In all the above
cases (1,2,3) it is sufficient to select a single file by means of
the 'Open Corpus' option (see below) or use the drag and drop
method.
Operations that follow any file
importation
At the end of the phase with which the files have been
imported in Corpus Builder, either when the user is 'not'
interested in the use of variables or when the encoding operations
have already been carried out, he may proceed with the 'Check /
Generate' option and afterwards with the exportation of the corpus
to be imported in T-LAB.
When the corpus is encoded it should be recalled that in
all three types of importation mentioned in the preceding sections
of this document ('A', 'B', 'C') data are displayed in various
columns, the headers of which can be the following:
- Variable, i.e.
categorical variables, the use of which is requested when analysing
the characteristics and the reciprocal relationships of various
corpus subsets;
- IDnumber, i.e. identifiers of
cases/records, the use of which is optional;
- My Texts, i.e. the texts to
be analysed, the use of which is mandatory and is allowed in a
single column only;
- Exclude, the use of which
indicates that data in the corresponding column(s) must not be
saved by the Corpus Builder module.
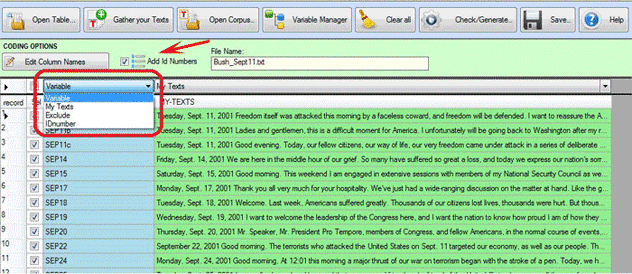
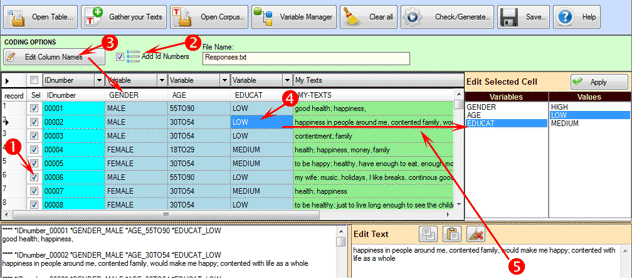
In all cases it must be remembered that:
- each record can be selected or deselected (see below '1'),
- IDnumbers can be automatically added (see below '2'),
- each variable name can be edited and changed (see below '3');
- each variable value can be edited and changed (see below '4')
- each 'My Text' field can be edited and changed too (see below
'5').
Further information:
- the number of columns with categorical variables must
not exceed 50;
- each variable can have a maximum of 150 values;
- the IDnumber values, if used, must be progressive starting from 1
(e.g. 1, 2, 3, etc.);
- each label, both for variables and values, must not exceed the
length of 25 alphanumeric characters (at least 2) and must not be
interrupted by blank spaces;
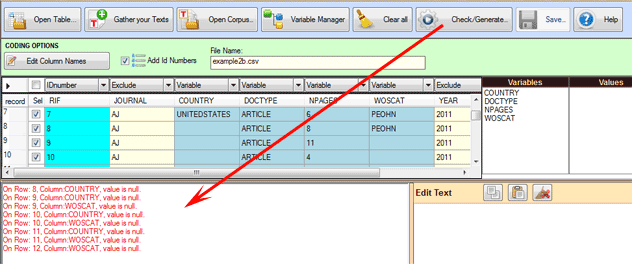
- when doing any operation, all detected errors are visualized in
the bottom-left window (see below).
Use of the Variable Manager
tool
The 'Variable Manager' tool allows the user to build,
edit, load, save and change any coding
scheme, even from a different corpus.
Each coding scheme includes the list of variables and that of their
values (see below) .
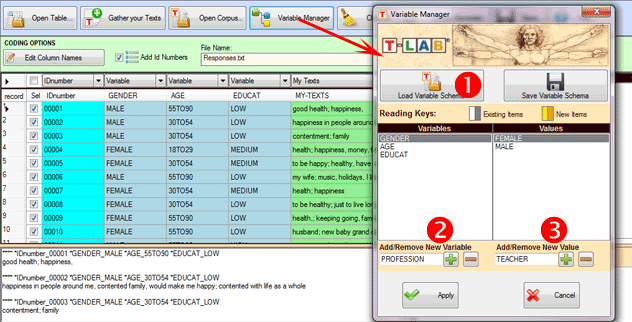
In order to add variables from a different corpus or from a
previously scheme saved the 'Load Variable Scheme' option must be
selected (see above '1'). Otherwise, to manually add variables and
their values, the sequence of the above '2' and '3' options must be
used.
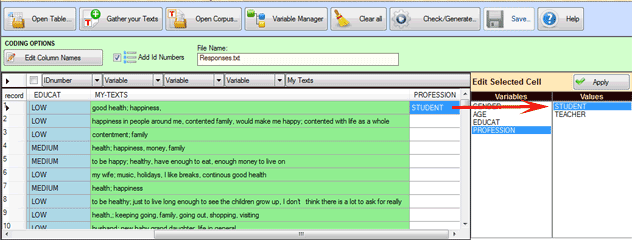
Any value assigned to individual records must be added manually
(see below) and in a single work session, this is because when
saving coding schemes the values of each record are not recorded.
Consequently, when the user is dealing with a corpus that includes
a considerable number of records and / or his job requires more
than one session, it is recommended to proceed as follows:
1 - import the amount of files / records that can be encoded in
a single work session;
2 - save one's work as a corpus (see the 'Save' option in the
Corpus Builder menu);
3 - then, in the subsequent session, re-import the corpus
previously saved (see above, point '2 '), add further records /
files to encode and continue.
When the basic operations have been carried out (i.e., two or more
texts have been gathered), by clicking the 'Check/Generate' button
the user can verify the correctness of his work and export (A) or
save (B) a corpus ready to be imported by T-LAB.
In the first case (A - see below) Corpus Builder creates
a new folder under the directory '..\My Documents\T-LAB PLUS\" and
automatically starts the importation procedure.
N.B.: In this case the new folder has the same name of the corpus
file.
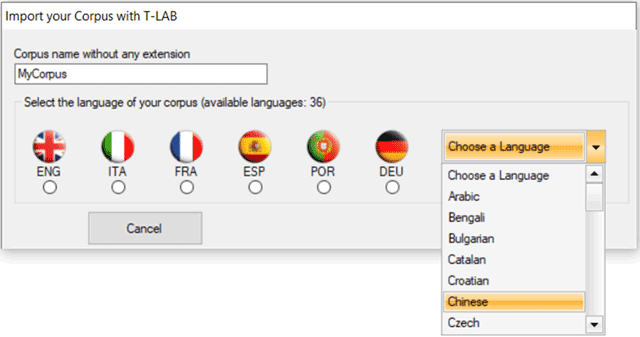
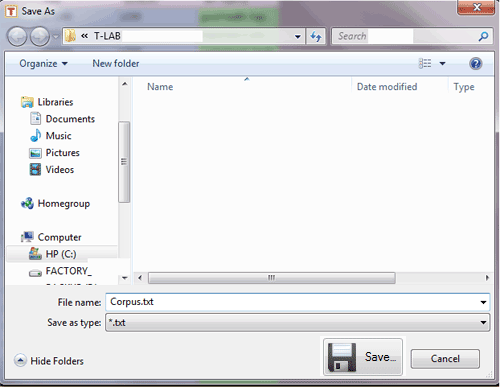
In the second case (B - see below) the user is enabled to
save his corpus in whatever folder he wishes and aftwerwards he has
to use the 'Import a corpus' option of T-LAB.
N.B.: In this case it is recommended that a new folder be created
which should contain only the corpus to be imported.
.
|